Interactive Jobs
Out-of-the-box Jupyter Lab, creation and management of interactive jobs, and related content
The Interactive Jobs feature provides users with out-of-the-box Jupyter Lab and Web IDE. This document aims to explain the creation and management of interactive jobs and related content.
Creating Interactive Jobs
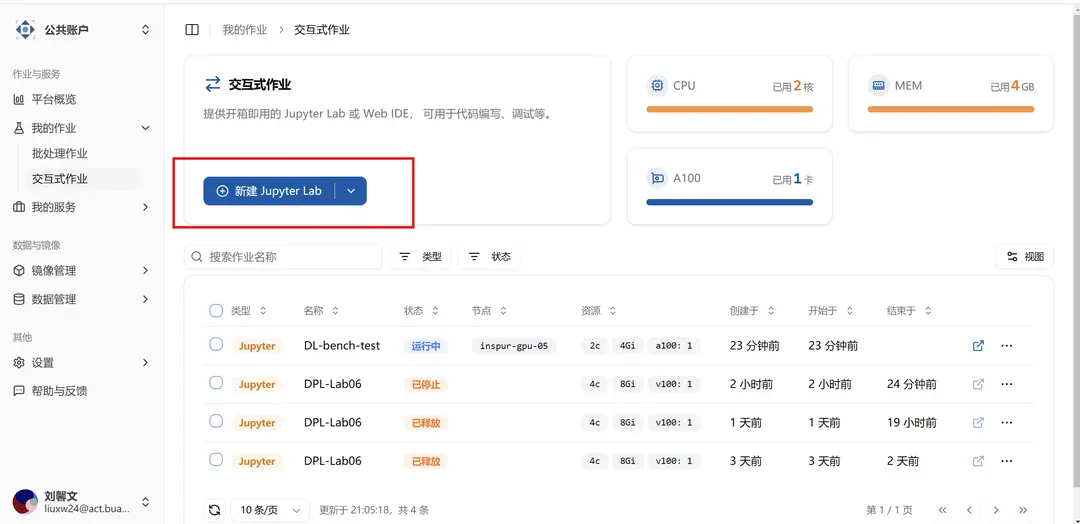
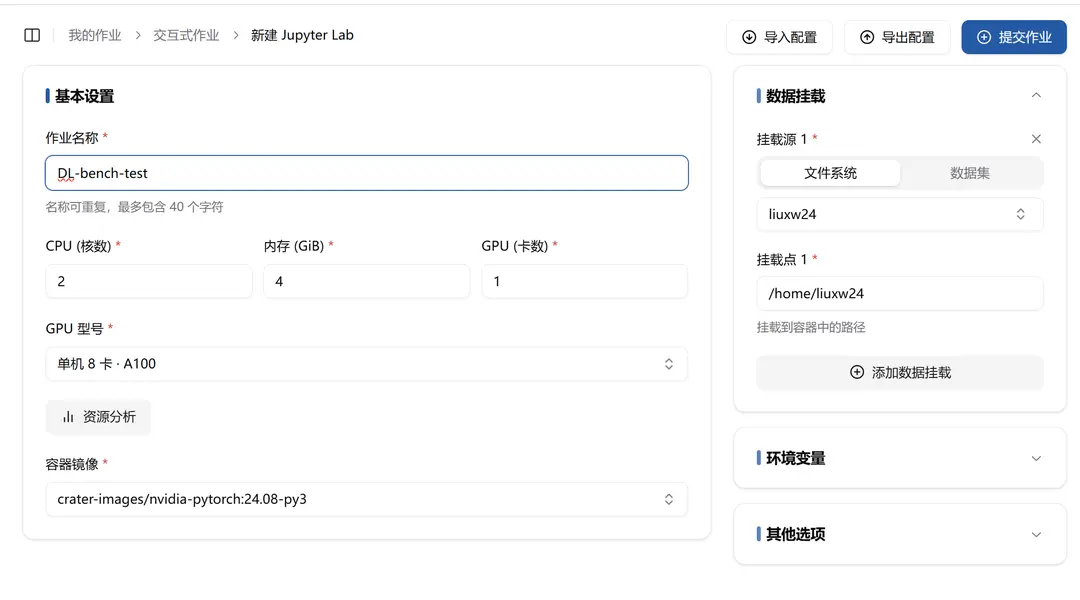
You can click the "New Jupyter Lab" button on the "Platform Overview" page or the "My Jobs" -> "Interactive Jobs" page to enter the new Jupyter Lab page.
On the "New Jupyter Lab" page, you can set various configurations for interactive jobs:
- Job name
- Job resources (including CPU cores, memory usage, whether to use GPU, and selecting the GPU model to use)
- Container image
- Set data mounting directory
- Add environment variables
- Other options
- Receive status notifications
- Enable node selection feature
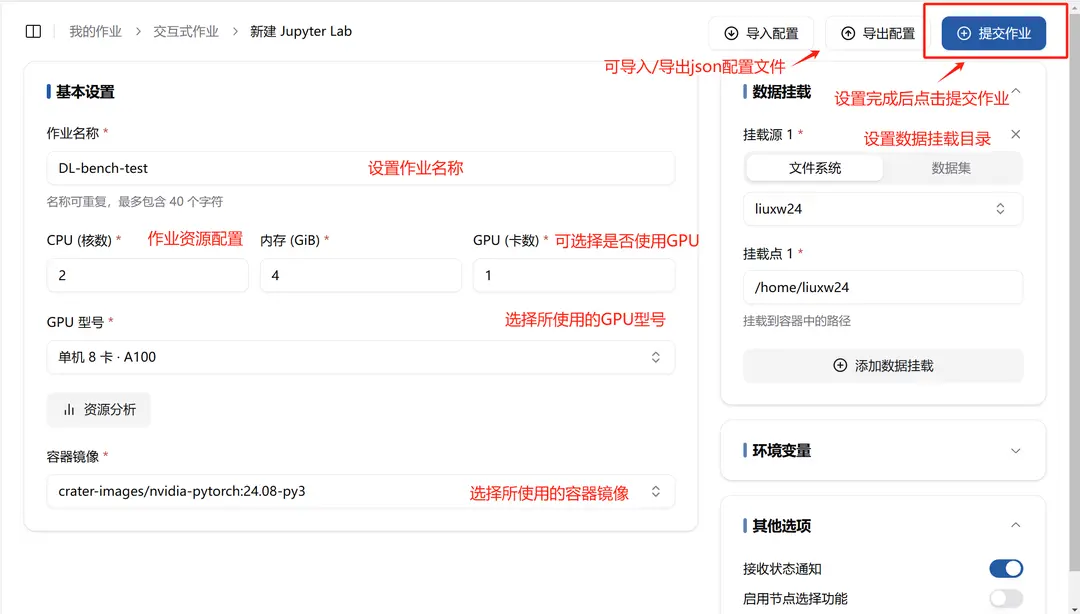
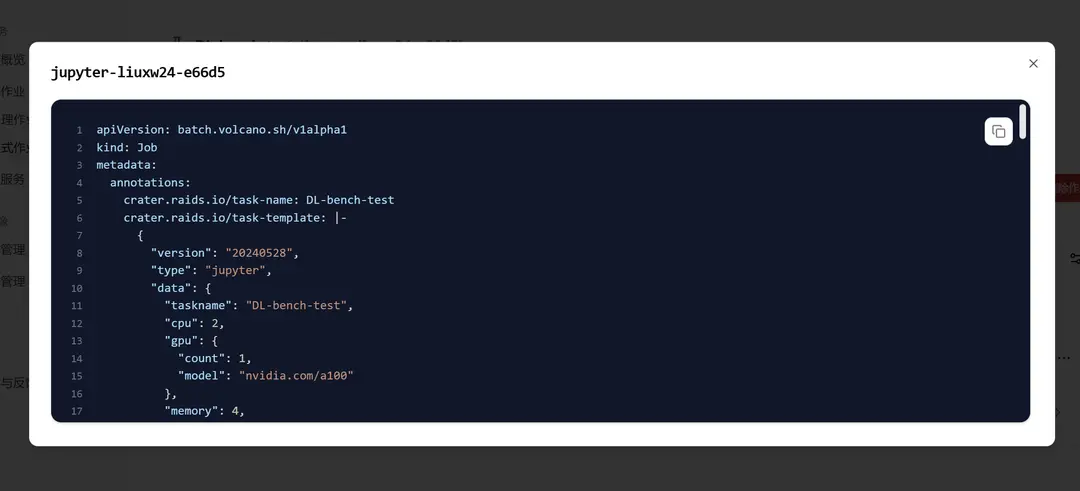
Various settings for interactive jobs can be done by importing a configuration file. Jobs that have already been set up can also be exported as a configuration file, as shown in the following example:
{
"version": "20240528",
"type": "jupyter",
"data": {
"taskname": "DL-bench-test",
"cpu": 2,
"gpu": {
"count": 1,
"model": "nvidia.com/a100"
},
"memory": 4,
"image": "harbor.act.buaa.edu.cn/crater-images/nvidia-pytorch:24.08-py3",
"volumeMounts": [
{
"type": 1,
"subPath": "liuxw24",
"mountPath": "/home/liuxw24"
}
],
"envs": [],
"observability": {
"tbEnable": false
},
"nodeSelector": {
"enable": false
}
}
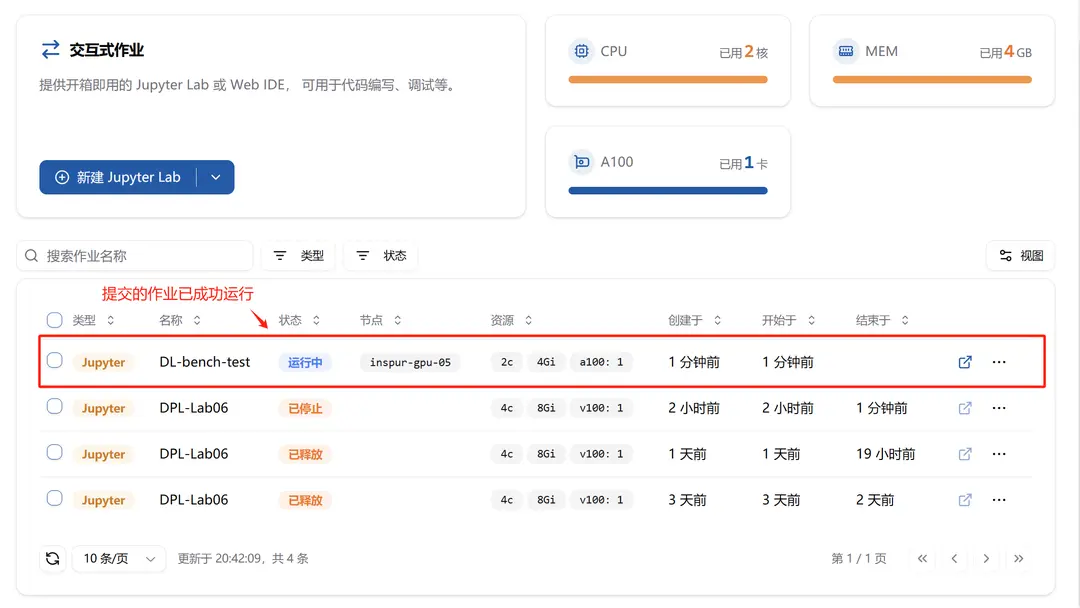
}You can see that the submitted job has successfully started.
Managing Created Jobs
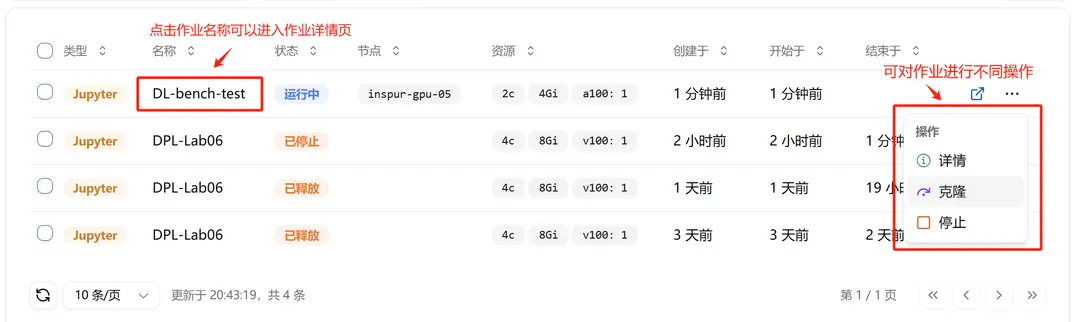
- Click the job name to navigate to the job details page
- Details: Navigate to the job details page
- Clone: Clone the job using the current job configuration (convenient for users to resubmit jobs with similar configurations)
- Stop: Stop the current job and release the resources it is using
Clicking "Clone" shows the following page:
You can see that a job with the same configuration as the cloned job is automatically created (auto-filled). Users can make minor adjustments and submit it.
Job Details Page
The job details page includes basic information such as the job's associated account, creator, job status, creation time, start time, and completion time.
It also provides various ways to monitor and manage the job.
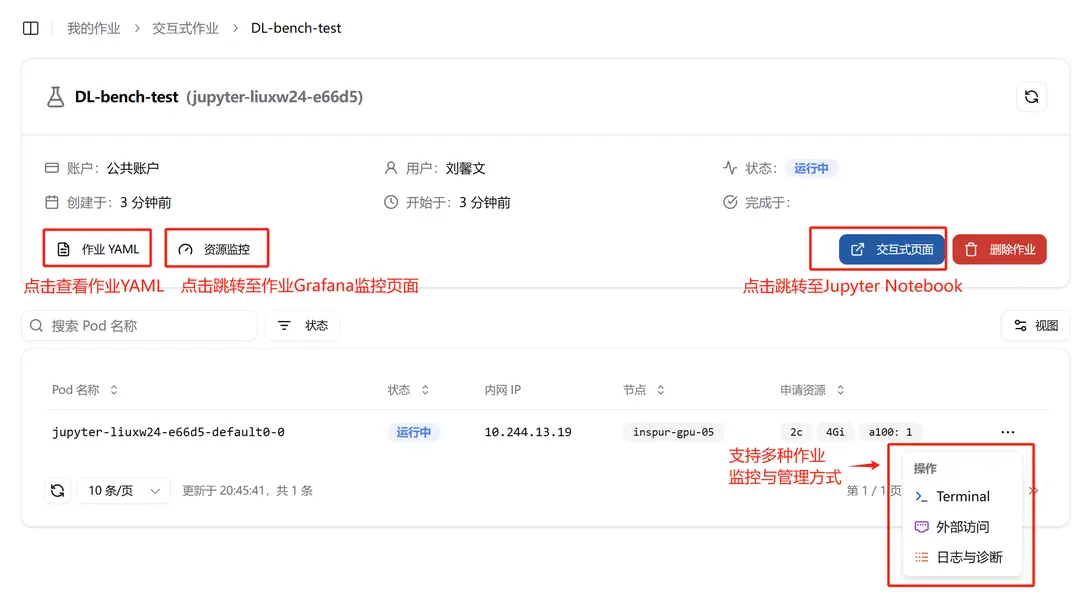
Job YAML
- Job YAML: Click to view the job YAML file
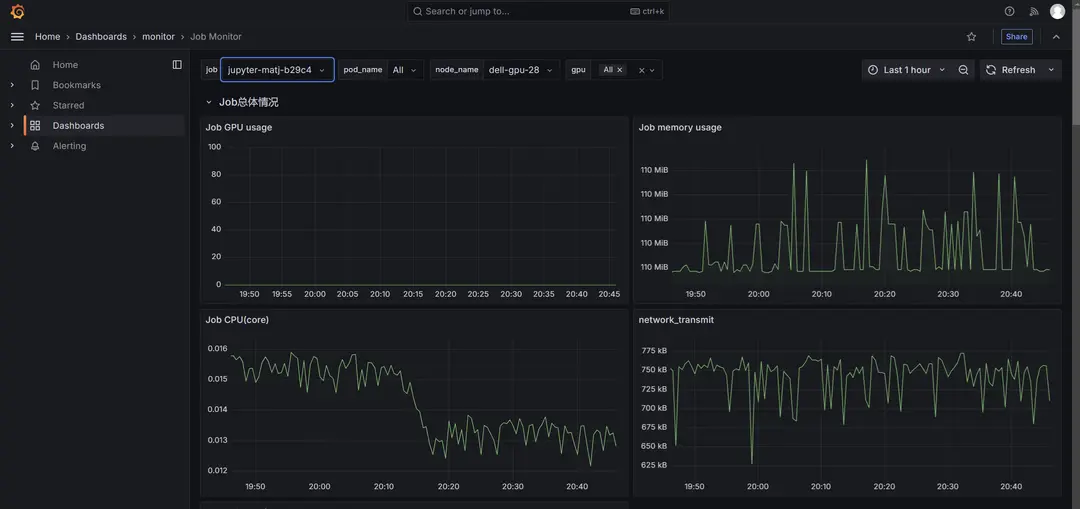
Resource Monitoring
- Resource Monitoring: Click to navigate to the job's Grafana monitoring page
Interactive Page
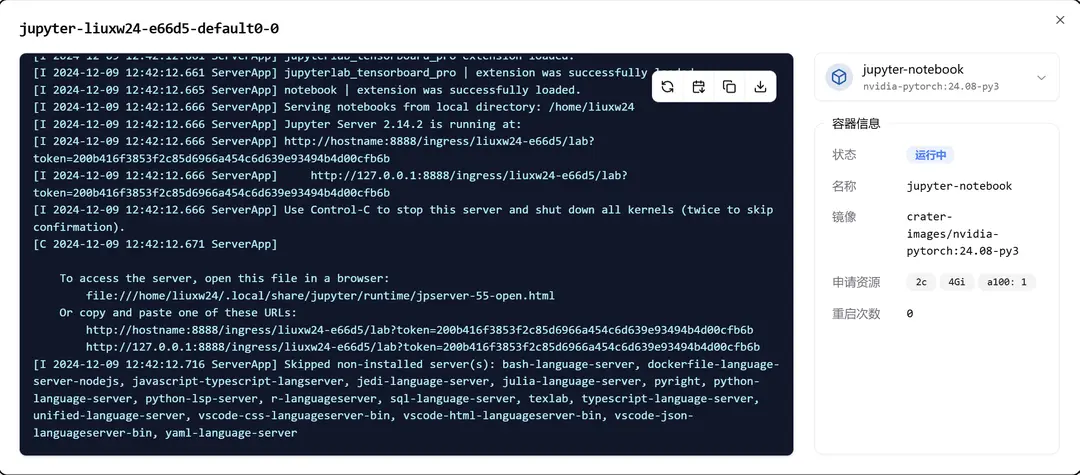
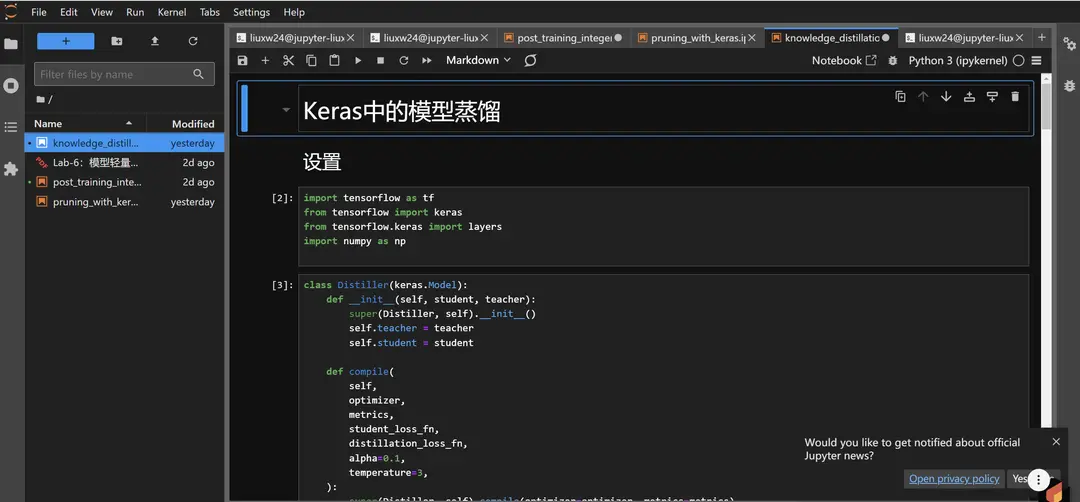
- Interactive Page: Click to navigate to Jupyter Notebook
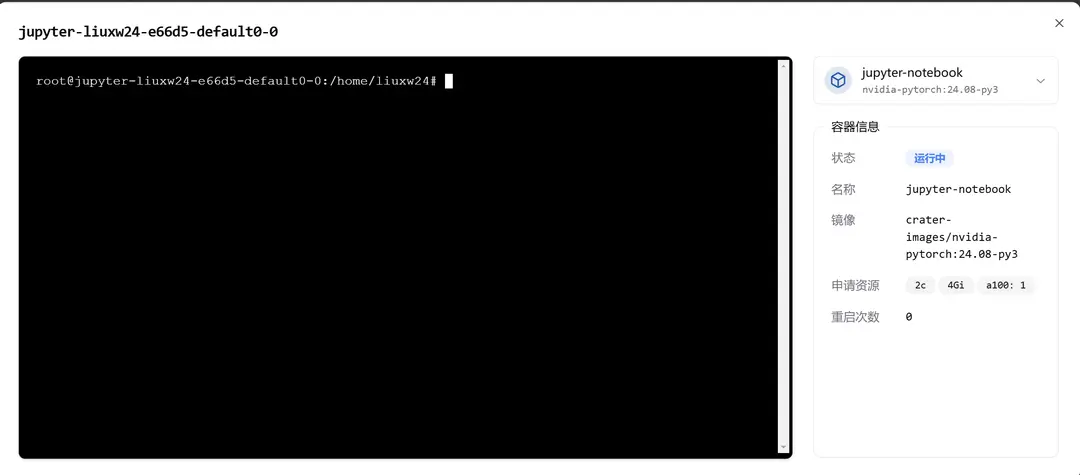
Terminal
- Terminal: Click to enter the job's Web Terminal
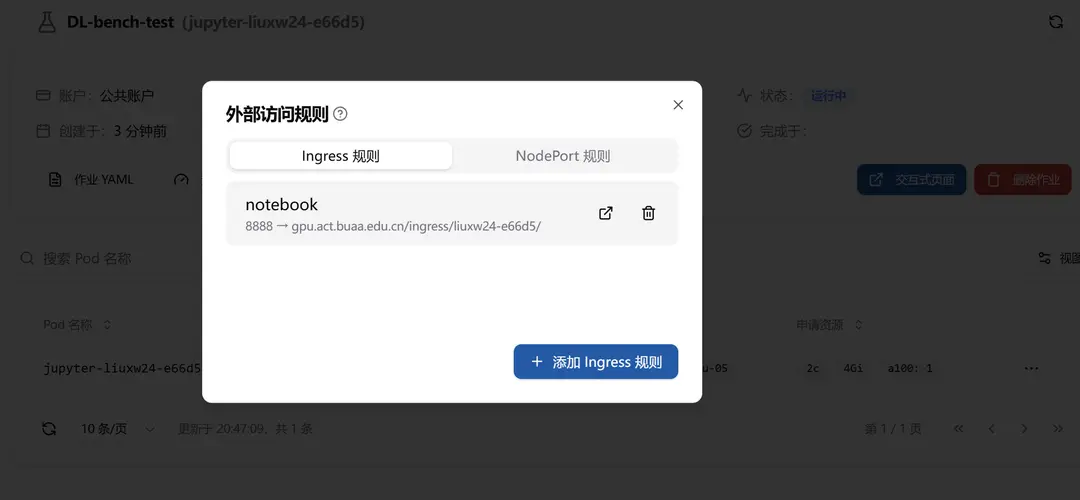
External Access
- External Access: Control external access rules for the job. See Setting External Access Rules for details.
Logs and Diagnostics
- Logs and Diagnostics: View job logs for fault location and analysis